Arduino Guide 2026:
Complete Beginner to Pro Tutorial
Step-by-step Arduino tutorial board selection, IDE setup, core concepts, and 7 hands-on projects with full code. Written for complete beginners. No prior electronics experience required.
🎯Key Takeaways
- ✅ Arduino is an open-source microcontroller platform that bridges the gap between software and the physical world
- ✅ Best board for 2026 beginners: Arduino Uno R4 WiFi built-in WiFi, USB-C, LED matrix, forward-compatible
- ✅ Arduino IDE 2.0 includes autocompletion, real-time debugger, serial plotter far beyond the old IDE
- ✅ You can learn without hardware using free simulators: Wokwi and Tinkercad
- ✅ Every Arduino sketch has two mandatory functions:
setup()runs once,loop()runs forever - ✅ In 2026, Arduino supports TensorFlow Lite ML on boards like the Nano 33 BLE Sense
What Every Arduino Engineer Should Know
For IoT projects, Arduino Uno R4 WiFi and ESP32 remain the top picks in 2026 low power, onboard WiFi, and large community libraries.
Always place a 100nF ceramic capacitor across the VCC and GND of every IC. It kills voltage spikes and prevents mysterious resets mid-project.
When driving motors or solenoids from GPIO pins, NPN transistors (like 2N2222) switch faster and more efficiently than PNP for low-side switching.
Using delay() blocks all code execution sensors stop reading, buttons stop responding. Use millis() for non-blocking timing once you move past beginner projects.
Arduino’s analogRead() returns 0–1023 (10-bit). For a 5V system: voltage = (reading / 1023.0) × 5.0. Apply this formula to any resistive sensor.
When your project outgrows Arduino’s 16 MHz clock, the ESP32 at 240 MHz with DMA, dual-core, and built-in WiFi/BLE is the natural next step.
What is Arduino? (60-Second Answer)
Arduino is an open-source electronics platform consisting of a microcontroller board and a programming environment (IDE). You write code on your computer, upload it via USB to the board, and the board executes your instructions in real time reading sensors, controlling LEDs, motors, displays, and communicating over WiFi or Bluetooth.
Unlike a smartphone or laptop that only lives in the digital world, Arduino interacts with the physical world. It is the tool that turns your code into real-world actions.
📋 Table of Contents
- What is Arduino? How It Works (The 3-Layer Model)
- Which Arduino Board Should You Buy in 2026?
- Arduino Board Anatomy Every Pin Explained
- How to Set Up Arduino IDE 2.0 (Step-by-Step)
- How to Write Your First Arduino Sketch Blink LED
- Essential Components Library (Inputs, Outputs, Support)
- 7 Milestone Projects with Full Code
- 12-Week Structured Learning Path (Zero to Advanced)
- Troubleshooting: 10 Most Common Arduino Problems Fixed
- Arduino FAQ
What is Arduino? How It Works
Arduino is best understood through its three layers hardware, software, and the programming language that ties them together:
| Layer | What It Is | Analogy | Examples |
|---|---|---|---|
| Hardware | Physical board with a microcontroller chip | The engine of a car | Uno R4, Nano, MKR WiFi |
| Software (IDE) | Program where you write and upload code | Steering wheel + pedals | Arduino IDE 2.0, Web Editor |
| Language | Simplified C++ that controls the board | Rules of the road | setup(), loop(), digitalWrite() |
When I first plugged in an Arduino Uno back in 2015, I uploaded the Blink example and stared at a blinking LED for ten minutes straight. It sounds trivial but that moment of “I just told a piece of hardware what to do” is genuinely hard to explain. My second project was a temperature alarm, and I burned my first LED because I forgot the current-limiting resistor. Lesson learned the cheap way. Now I always say: your first burnt component is your best teacher.
Oliver Adams, Embedded Systems Engineer, ProcirelWhat Makes Arduino Different from a Regular Computer?
A laptop or smartphone processes information and displays results on a screen it stays in the digital world. Arduino can read physical inputs (button presses, temperature, distance, light levels) and control physical outputs (turn on LEDs, spin motors, open valves, send wireless signals). This digital-to-physical bridge is what makes Arduino the foundation of robotics, IoT devices, smart home systems, and maker projects worldwide.
Why Arduino Still Matters in 2026
Arduino has evolved dramatically. The new R4 family runs a 48 MHz ARM Cortex-M4 processor 3× faster than the classic R3. Boards like the Nano 33 BLE Sense can run TensorFlow Lite machine learning models directly on the chip. Free simulators (Wokwi, Tinkercad) mean you can learn without buying hardware. And the community of 30+ million makers means solutions to virtually any problem already exist online.
Which Arduino Board Should You Buy in 2026?
The board you choose matters different boards suit different use cases. Here is the complete breakdown for 2026:
| Board | Processor | Clock | RAM | Wireless | Price | Best For |
|---|---|---|---|---|---|---|
| Uno R3 | ATmega328P | 16 MHz | 2 KB | None | ~$23 | Classic starter |
| Uno R4 Minima | RA4M1 (ARM) | 48 MHz | 32 KB | None | ~$20 | Modern starter |
| Uno R4 WiFi ⭐ | RA4M1 (ARM) | 48 MHz | 32 KB | WiFi + BT | ~$28 | Best 2026 beginner |
| Nano Every | ATmega4809 | 20 MHz | 6 KB | None | ~$18 | Compact projects |
| Nano 33 IoT | SAMD21 | 48 MHz | 32 KB | WiFi + BT | ~$22 | IoT + wearables |
| Nano 33 BLE Sense | nRF52840 | 64 MHz | 256 KB | BLE | ~$36 | AI / ML projects |
| MKR WiFi 1010 | SAMD21 | 48 MHz | 32 KB | WiFi + BT | ~$35 | Secure IoT |
| Portenta H7 | STM32H747 dual | 480 MHz | 1 MB | WiFi + BT | ~$100 | Industrial / AI |
For beginners in 2026, the Uno R4 WiFi ($28) is the clear choice. It has the same physical pin layout as the classic Uno R3 (so all R3 shields and tutorials work), but adds a 48 MHz ARM processor, 32 KB RAM (16× more than R3), built-in WiFi and Bluetooth, a 12×8 LED matrix, USB-C port, and a real-time clock. It’s the board you won’t outgrow in two years.
Arduino Board Anatomy Every Pin Explained
| Component | Function | Key Spec (Uno R4) | How You Use It |
|---|---|---|---|
| Microcontroller | Executes your code | ARM Cortex-M4, 48 MHz | Automatic runs your sketch |
| Digital Pins (0–13) | Read/write HIGH or LOW | 5V logic, 20mA max per pin | digitalRead(pin) / digitalWrite(pin, HIGH) |
| PWM Pins (~) | Fake analog output (0–255) | Pins 3,5,6,9,10,11 on Uno | analogWrite(pin, value) |
| Analog Pins (A0–A5) | Read 0–5V as 0–1023 | 10-bit ADC, 6 channels | analogRead(A0) |
| Power Pins | Supply voltage to components | 5V (500mA), 3.3V (50mA), GND | Connect sensor power rails |
| USB-C | Power + programming | USB-C on R4 (micro-USB on R3) | Connect to PC to upload code |
| RESET button | Restart program from beginning | Active low | Press if board freezes |
| Built-in LED | Test digital output (pin 13) | Onboard, no resistor needed | digitalWrite(LED_BUILTIN, HIGH) |
How to Set Up Arduino IDE 2.0 (Step-by-Step)
Download Arduino IDE 2.0
Go to arduino.cc/en/software. Download the installer for your OS (Windows EXE, macOS DMG, Linux AppImage). File size: ~200 MB. IDE 2.0 is the current version do not install the old IDE 1.x.
Install and launch
Windows: Run the EXE, accept UAC prompt, follow wizard. macOS: Drag to Applications folder. Linux: chmod +x arduino-ide_2.x.x_Linux_64bit.AppImage then double-click. On first launch, IDE installs board support packages (~2 min).
Connect your board
Plug the USB cable from your Arduino to your computer. Wait 10 seconds for driver installation. In IDE: Tools → Board → Arduino AVR Boards → Arduino Uno (for Uno R3) or Arduino UNO R4 Boards → Arduino UNO R4 WiFi (for R4).
Select the correct port
Tools → Port → select the port showing your board name (e.g., “COM3 (Arduino Uno)” on Windows, “/dev/cu.usbmodem…” on macOS). If no port shows, check USB cable some cables are charge-only and don’t carry data.
Upload the Blink test sketch
File → Examples → 01.Basics → Blink. Click the right-arrow Upload button. IDE compiles and uploads (~15 seconds). If the onboard LED starts blinking once per second your setup is complete and working. 🎉
Pro Tip IDE 2.0 New Features Worth Knowing
Autocomplete (Ctrl+Space): suggests function names and parameters as you type. Serial Plotter (Tools menu): plots Serial.println(value) data as a real-time graph essential for debugging sensor readings. Board Manager: installs support for non-AVR boards (ESP32, STM32) without leaving the IDE.
Wokwi (wokwi.com): Free browser-based simulator supporting Arduino Uno/Mega/Nano, ESP32, and Raspberry Pi Pico. Includes virtual LEDs, sensors, motors, LCD displays. Your code runs as if on real hardware. Tinkercad Circuits (tinkercad.com): Beginner-friendly drag-and-drop interface with simulation. Good for wiring diagrams. Both are free no account required for Wokwi.
How to Write Your First Arduino Sketch Understanding the Structure
Every Arduino program (called a “sketch”) has the same two mandatory functions. Understanding their purpose unlocks all Arduino programming:
| Core Function | What It Does | Returns | Example |
|---|---|---|---|
pinMode(pin, mode) | Set pin as INPUT or OUTPUT | void | pinMode(13, OUTPUT) |
digitalWrite(pin, val) | Set digital pin HIGH (5V) or LOW (0V) | void | digitalWrite(13, HIGH) |
digitalRead(pin) | Read digital pin returns HIGH or LOW | int | int btn = digitalRead(7) |
analogRead(pin) | Read 0–5V as integer 0–1023 | int | int val = analogRead(A0) |
analogWrite(pin, val) | PWM output 0–255 on ~ pins | void | analogWrite(9, 128) |
delay(ms) | Pause execution for milliseconds | void | delay(500) |
millis() | Time since board start in ms (non-blocking) | unsigned long | unsigned long t = millis() |
Serial.println(val) | Print value to Serial Monitor + newline | void | Serial.println(temperature) |
Essential Components Library
Input Sensors
| Component | Measures | Arduino Connection | Key Function | Cost |
|---|---|---|---|---|
| Push Button | On/Off | Digital pin + 10kΩ pull-down | digitalRead(pin) | $0.10 |
| Potentiometer | Variable 0–5V | Analog pin | analogRead(pin) | $0.50 |
| LDR (Photoresistor) | Light level | Analog pin + voltage divider | map(val, 0, 1023, 0, 100) | $0.20 |
| HC-SR04 Ultrasonic | Distance (2–400cm) | Trig pin + Echo pin | pulseIn(echoPin, HIGH) | $2 |
| DHT22 | Temp (±0.5°C) + Humidity | Any digital pin + library | dht.readTemperature() | $5 |
| PIR Motion Sensor | Motion detection | Digital pin | digitalRead(pirPin) | $3 |
| MPU-6050 | 3-axis gyro + accelerometer | I2C (SDA, SCL) | Wire library | $3 |
Output Actuators
| Component | Does | Connection | Key Function | Cost |
|---|---|---|---|---|
| LED | Light on/off or dimmed | Digital/PWM pin + 220Ω resistor | digitalWrite / analogWrite | $0.10 |
| RGB LED | Any color via mixing | 3× PWM pins + resistors | analogWrite(redPin, 128) | $0.30 |
| Piezo Buzzer | Tones and melodies | Digital/PWM pin | tone(pin, 440, 500) | $0.50 |
| Servo Motor | Precise 0–180° rotation | Signal pin + 5V + GND | servo.write(90) | $3 |
| DC Motor | Continuous spin | L298N motor driver | digitalWrite(in1, HIGH) | $1 + $3 driver |
| LCD 16×2 I2C | Text display | I2C (SDA, SCL + 5V/GND) | lcd.print("Hello") | $4 |
| 0.96″ OLED I2C | 128×64 pixel graphics | I2C (SDA, SCL) | display.drawBitmap() | $4 |
Connecting an LED directly to an Arduino pin (without a resistor) will damage both the LED and potentially the Arduino’s output driver. Use a 220Ω resistor in series for 5V systems (470Ω for brighter LEDs with longer life). Formula: R = (Vcc − Vf) / If = (5 − 2.0) / 0.02 = 150Ω minimum → use 220Ω for safety margin.
7 Milestone Projects with Full Code
These projects are designed as a progressive learning path each one introduces new concepts that build on the previous. In my own teaching experience, I’ve found that people who build one physical project per week remember concepts 3× better than those who only read tutorials.
In one of my early test projects, I used an HC-SR04 ultrasonic sensor to build a parking distance alert for my garage. The concept was simple measure distance, beep faster as the car gets closer. But I spent two hours debugging before realizing I’d swapped the Trig and Echo pins. Now I tape a label on every breadboard wire during prototyping. It sounds trivial. It saves hours.
Oliver Adams, Embedded Systems Engineer📊 Project Difficulty Levels 40+ Projects Organized by Tier
Whether you’re picking up Arduino for the first time or looking for a challenge to push your skills, here’s how the Procirel project library is organized:
Weeks 1–3 · Foundation
- LED Blink & patterns
- Button-controlled LED
- Potentiometer dimmer
- Buzzer melody player
- Traffic light controller
- Serial Monitor sensor reader
Weeks 4–7 · Integration
- DHT22 temperature + LCD
- Ultrasonic distance meter
- PIR motion alarm
- Servo door lock
- Obstacle-avoiding robot
- IR remote control
Weeks 8–12 · Professional
- WiFi IoT sensor dashboard
- OTA firmware updates
- EEPROM data logging
- Interrupt-driven systems
- TensorFlow Lite gesture AI
- MODBUS industrial sensor
The 7 Milestone Projects in Detail
These projects are designed as a progressive learning path each one introduces new concepts that build on the previous.
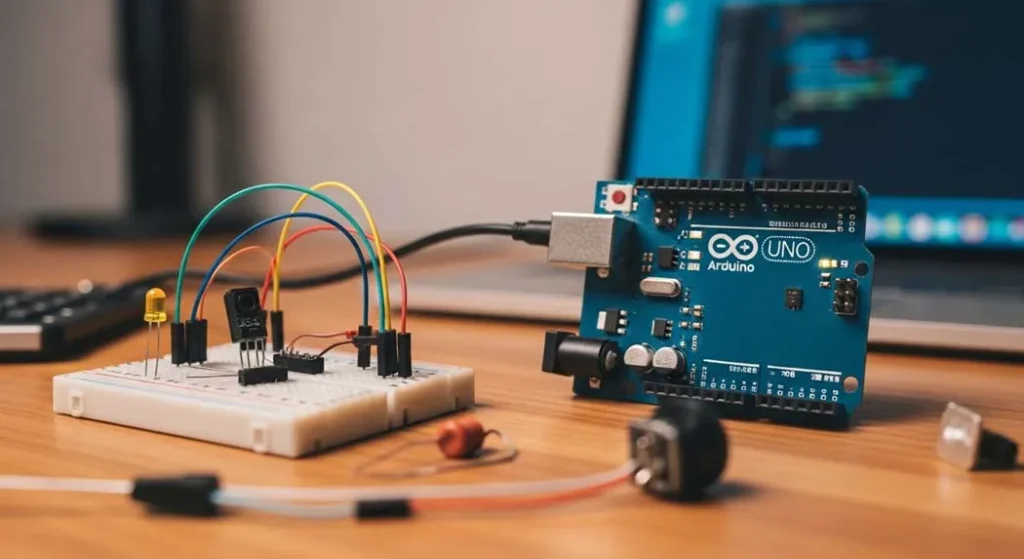
Project 1: LED Blink (Hello World)
Parts: Arduino board, 1× LED, 1× 220Ω resistor, 2× jumper wires, breadboard
Wiring: LED anode (long leg) → D13 via 220Ω resistor. LED cathode (short leg) → GND.
Troubleshooting: LED not lighting? Reverse it (LEDs are polarized). Still dark? Check resistor value with a multimeter. Verify pin number matches wiring.
Project 2: Button-Controlled LED
Parts: Arduino, 1× LED + 220Ω, 1× push button, 1× 10kΩ resistor, breadboard
Wiring: Button leg 1 → 5V. Button leg 2 → D7 + 10kΩ resistor to GND (pull-down). LED → D9 via 220Ω → GND.
Project 3: Temperature & Humidity Monitor
Parts: Arduino, DHT22 sensor, 10kΩ pull-up resistor, breadboard
Library: Install “DHT sensor library” by Adafruit via Tools → Library Manager.
Wiring: DHT22 pin 1 → 5V. Pin 2 → D2 + 10kΩ to 5V (pull-up). Pin 4 → GND.
Project 4: Ultrasonic Distance Meter
Parts: Arduino, HC-SR04 ultrasonic sensor, breadboard
Wiring: HC-SR04 VCC → 5V. GND → GND. Trig → D9. Echo → D10.
Project 5: Servo Motor Controller
What you will learn: How to control a servo motor’s position using a potentiometer. This introduces the Servo.h library, the map() function for scaling values, and how analog inputs can directly control mechanical outputs the foundation of robotic arms and pan-tilt camera rigs.
Parts: Arduino board, 1× SG90 servo motor, 1× 10kΩ potentiometer, jumper wires, breadboard, external 5V power supply (recommended for servo)
Wiring:
- Potentiometer left pin → Arduino 5V | Middle (wiper) pin → A0 | Right pin → GND
- Servo orange wire (signal) → Arduino digital pin 9
- Servo red wire (VCC) → External 5V supply (not Arduino 5V pin servo draws too much current)
- Servo brown wire (GND) → Arduino GND and external supply GND (shared ground is essential)
#include <Servo.h> loads the servo library so Arduino knows how to generate the 50Hz PWM signal servos require. map(potVal, 0, 1023, 0, 180) scales the 10-bit ADC reading (0–1023) to a degree range (0–180). myServo.write(angle) commands the servo to move to that exact angle. The 15ms delay gives the servo mechanical time to physically reach the position before the next command arrives.
Turning the potentiometer clockwise rotates the servo arm from 0° to 180°. The Serial Monitor shows live potentiometer and angle values updating every 15ms. The servo should move smoothly with no jitter (if jitter occurs, add a 100µF capacitor across the servo’s VCC and GND).
- Powering servo from Arduino 5V pin: The SG90 can draw up to 500mA stall current this overloads Arduino’s on-board regulator and causes resets. Always use an external 5V supply.
- Forgetting shared GND: External supply GND must be connected to Arduino GND, otherwise the signal wire has no reference and the servo behaves erratically.
- Calling servo.write() too fast: Without the delay(15), commands arrive faster than the servo can move, causing missed positions and jitter.
Upgrade ideas: Replace potentiometer with a joystick module (X-axis + Y-axis) to control a 2-axis pan-tilt rig. Add an OLED display to show current angle. Record positions to EEPROM and play them back automatically.
Project 6: Automatic Night Light (LDR + millis())
What you will learn: How to use a Light Dependent Resistor (LDR) in a voltage divider to measure ambient light, and critically how to use millis() for non-blocking timing instead of delay(). This is the most important code pattern to master before building any real-world Arduino project. Using delay() freezes your entire program; millis() keeps it responsive.
Parts: Arduino board, 1× LDR (photoresistor), 1× 10kΩ resistor, 1× LED, 1× 220Ω resistor, jumper wires, breadboard
Wiring:
- LDR voltage divider: 5V → LDR → junction point (A0) → 10kΩ resistor → GND
- LED anode → D13 via 220Ω resistor | LED cathode → GND
- In bright light, LDR resistance is low (~200Ω), pulling A0 voltage high. In darkness, LDR resistance rises (~1MΩ), pulling A0 voltage low the 10kΩ resistor anchors the divider.
unsigned long previousMillis = 0 stores the timestamp of the last sensor check. Inside loop(), we call millis() which returns the milliseconds since power-on, and check if 500ms have passed. If yes, we read the LDR and update the LED. If no, loop() simply keeps running it is never frozen. Compare this to delay(500) which would completely halt the processor, making it impossible to respond to buttons, communicate over Serial, or run any other logic simultaneously. Once you understand millis(), you will never use delay() in production code again.
Cover the LDR with your hand LED turns ON within 500ms. Uncover it LED turns OFF. Serial Monitor shows live LDR readings and LED state. Calibrate the THRESHOLD value: print raw LDR values in your room during day and night, then set the threshold between the two readings.
- Wrong threshold: The threshold depends on your room’s lighting. Print the raw analogRead() value first if bright room reads 700 and dark reads 150, set THRESHOLD to 400.
- LDR wired backwards: The LDR has no polarity, but the voltage divider direction matters. If your LED is ON in bright light and OFF in dark, swap which side of the divider connects to 5V.
- Using delay() instead of millis(): If you replace the millis() logic with delay(500), the board freezes for half a second on every check making it unresponsive to anything else.
Upgrade ideas: Replace the LED with a relay to control a real lamp. Add a potentiometer to set the threshold dynamically. Log light levels to EEPROM every hour for a 24-hour light chart.
Project 7: WiFi Temperature & Humidity Dashboard
What you will learn: How to turn your Arduino into a web server that serves a live temperature and humidity dashboard accessible from any browser on your local WiFi network. This is the gateway to IoT your Arduino becomes a device you can monitor from your phone, laptop, or tablet without any cloud service.
Parts: Arduino Uno R4 WiFi (built-in WiFi required), 1× DHT22 temperature & humidity sensor, 1× 10kΩ pull-up resistor, jumper wires, breadboard, smartphone or laptop (same WiFi network)
Wiring:
- DHT22 pin 1 (VCC) → Arduino 3.3V
- DHT22 pin 2 (DATA) → Arduino D2 with 10kΩ pull-up resistor between DATA and VCC
- DHT22 pin 4 (GND) → Arduino GND
- Connect Arduino to your computer via USB for initial programming, then it runs standalone on any USB power supply
In Arduino IDE 2.0: go to Tools → Manage Libraries and install: DHT sensor library by Adafruit, and Adafruit Unified Sensor. The WiFiS3 library is built into Arduino Uno R4 boards package no separate install needed.
WiFiServer server(80) creates an HTTP server on port 80 (standard web port). After connecting to WiFi, Serial.println(WiFi.localIP()) prints the Arduino’s IP address open this in your browser. Each time a browser visits, server.available() returns a client connection. We then read the sensor and respond with a complete HTML page. The Refresh: 5 HTTP header tells the browser to auto-reload every 5 seconds, creating a live dashboard with no JavaScript required.
After uploading, open Serial Monitor (9600 baud) it will show the Arduino’s local IP address (e.g., 192.168.1.105). Open that IP in any browser on the same WiFi network. You will see a dark-themed dashboard showing live temperature (°C) and humidity (%), updating automatically every 5 seconds. This works from your phone too no internet connection required.
- Wrong board / wrong library: WiFiS3.h is specific to Arduino Uno R4. If you’re on an older board, use the ESP8266WiFi.h or WiFiNINA.h library instead.
- DHT22 returns NaN: Missing or wrong pull-up resistor. Add a 10kΩ resistor between the DATA pin and VCC. Also add a 500ms delay after
dht.begin()in setup(). - Can’t reach the IP in browser: Make sure your phone/laptop is on the same WiFi network as the Arduino. Some routers block device-to-device communication check your router’s “AP isolation” settings.
- Serial Monitor shows connection dots forever: Double-check SSID and PASSWORD spelling they are case-sensitive. 5GHz-only networks won’t work; the R4 WiFi connects to 2.4GHz only.
Upgrade ideas: Send data to Arduino IoT Cloud for remote monitoring from anywhere. Add a timestamp using the WiFi module’s NTP time sync. Store hourly readings to EEPROM and serve a 24-hour history table in the HTML page.
12-Week Structured Learning Path
This roadmap synthesizes the best learning sequences from university courses, official Arduino resources, and maker community experience.
Projects 1–2 (LED Blink, Button). Learn: pinMode, digitalWrite, digitalRead, Serial.println, if/else, basic variables.
Projects 3–4 (DHT22, HC-SR04). Learn: analogRead, analogWrite, map(), sensor libraries, voltage dividers.
Projects 5–6 (Servo, Night Light). Learn: servo library, millis() non-blocking timing, threshold logic, multiple libraries simultaneously.
Add LCD 16×2 I2C display to Projects 3 and 4. Learn: I2C addressing, LiquidCrystal_I2C library, Wire.h, OLED with Adafruit GFX.
Project 7 (WiFi Dashboard). Learn: WiFi.h library, HTTP GET/POST, JSON parsing, Arduino IoT Cloud, OTA firmware updates on R4 WiFi.
Learn: hardware interrupts (attachInterrupt()), EEPROM data persistence, low-power sleep modes, TensorFlow Lite basics on Nano 33 BLE Sense.
Arduino in Industrial & Professional Systems
What started as an educational tool has evolved into a legitimate platform for professional and industrial applications. The transition from ATmega-based Uno to the ARM Cortex-M4 on the Uno R4 running at 48 MHz with DMA (Direct Memory Access) support opened doors that hobbyist boards simply couldn’t enter before.
In professional environments, engineers use Arduino-compatible architectures as rapid-prototyping layers before committing to custom PCBs. Here’s where Arduino genuinely earns its place in serious engineering work:
Arduino shields like the L298N and DRV8833 enable PWM-controlled DC and stepper motor drivers. For precision servo motion in CNC and robotics, GRBL firmware runs on standard Arduino hardware the same firmware used in commercial CNC routers.
When moving from breadboard to production PCB, engineers implement proper ground planes, star-point grounding, and EMI shielding all techniques directly applicable to Arduino-based designs. The jump to a 2-layer PCB in KiCad is a natural next step after breadboard prototyping.
Arduino’s RS-485 shield enables MODBUS RTU communication the protocol behind thousands of industrial sensors and PLCs. Projects that start on a breadboard often become the actual sensor node in a factory automation system.
The Arduino Nano 33 BLE Sense runs TensorFlow Lite models for gesture recognition, vibration anomaly detection, and keyword spotting all at the edge, without cloud dependency. This is the same architecture used in predictive maintenance systems in industrial IoT.
I’ve reviewed Arduino-based designs that went directly into low-volume commercial products water quality monitors, greenhouse climate controllers, EV charging station auxiliaries. The platform isn’t “just for beginners.” The real skill ceiling comes when you start combining it with custom PCBs, proper EMC practices, and production firmware. That’s where Arduino becomes genuinely powerful.
Oliver Adams, 9 years industrial automationTroubleshooting: 10 Most Common Arduino Problems Fixed
Many beginners forget to connect GND correctly especially when using multiple power rails on a breadboard. I once spent 45 minutes debugging a DHT22 temperature sensor that kept returning “nan” (not a number). The sensor was wired correctly, the code was correct, the library was correct. The problem? I had accidentally used two separate GND rows on the breadboard that weren’t connected to each other. A single jumper wire fixed it. Always verify your ground connections first it’s the most common root cause of mysterious sensor failures.
Oliver Adams, Embedded Systems Engineer| # | Problem | Likely Cause | Fix |
|---|---|---|---|
| 1 | No port appears in Tools menu | Charge-only USB cable (no data lines) | Replace with a data-capable USB cable test by checking if phone charges AND syncs with same cable |
| 2 | “avrdude: stk500_recv() error” on upload | Wrong board selected, or bootloader damaged | Verify Tools → Board matches your physical board. Try pressing Reset just before clicking Upload |
| 3 | LED doesn’t light up | LED reversed, or wrong pin | LEDs are polarized long leg = anode = to resistor. Short leg = cathode = to GND |
| 4 | Sensor reads 0 or 1023 always | Voltage divider missing, or wrong pin type | Analog sensors need voltage divider. Check you’re using A0–A5 pins, not D0–D13 |
| 5 | Board resets randomly | Insufficient power (USB current limited) | Power board via DC jack with 9V adapter instead of USB, especially with motors or servos attached |
| 6 | DHT22 returns NaN | Missing pull-up resistor, or too-short delay between reads | Add 10kΩ pull-up resistor between Data and 5V. DHT22 needs minimum 2000ms between readings |
| 7 | Servo jitters or vibrates | Insufficient current from Arduino 5V pin | Power servo from external 5V source share only GND with Arduino. Arduino 5V pin maxes at ~500mA |
| 8 | Code uploads but nothing happens | Logic error: setup() never reached | Add Serial.begin(9600) and Serial.println("setup") at start of setup(). Open Serial Monitor to verify |
| 9 | I2C device not found | Wrong I2C address, SDA/SCL swapped | Run I2C scanner sketch (available on Arduino forums). Verify SDA = A4, SCL = A5 on Uno |
| 10 | Sketch compiles but delay() causes missed events | delay() blocks execution completely | Replace delay() with millis()-based non-blocking timing. See Project 6 approach |
Pro Tip Serial Monitor is Your Best Debugging Tool
Add Serial.begin(9600) to every setup() and sprinkle Serial.println(variableName) throughout your code. Open Tools → Serial Monitor (Ctrl+Shift+M) and watch values in real time. 90% of Arduino bugs are found in 30 seconds this way. Stuck? Print every variable at every step until you find where the value goes wrong.
❓ Arduino FAQ
Arduino is an open-source electronics platform combining a microcontroller board with programming software (IDE). It reads inputs from sensors (temperature, distance, light, motion) and controls outputs (LEDs, motors, displays, WiFi communication) based on code you write. Common applications include home automation, robotics, IoT sensors, wearables, scientific instruments, and maker art projects. The platform is used by students, hobbyists, and professional engineers worldwide.
The Arduino Uno R4 WiFi ($28) is the best choice for beginners in 2026. It uses the same physical layout as the classic Uno R3, so all tutorials work, but upgrades to a 48 MHz ARM Cortex-M4 processor, 32 KB RAM (16× more than R3), USB-C, built-in WiFi and Bluetooth, a 12×8 LED matrix, and a real-time clock. It is forward-compatible with future projects. If budget is tight, the Arduino Uno R4 Minima ($20) has the same processor without WiFi.
Arduino uses simplified C++ with an Arduino-specific abstraction layer. The core language features variables, if/else, for loops, functions, arrays are standard C++. Arduino adds convenient hardware-control functions (digitalWrite, analogRead, delay, Serial.println) that hide the low-level register manipulation. If you know any C-family language (C, C++, Java, Processing), you can start writing Arduino code immediately. If not, the Arduino language is one of the easiest programming environments to learn from scratch.
Yes. Two free browser-based simulators work excellently: Wokwi (wokwi.com) simulates Arduino Uno, Mega, Nano, ESP32, and Raspberry Pi Pico with virtual LEDs, sensors, displays, and a serial monitor no account needed. Tinkercad Circuits (tinkercad.com) by Autodesk provides a beginner-friendly drag-and-drop interface with simulation. Both run your actual C++ code and simulate hardware behavior accurately enough to learn all fundamental concepts before buying physical components.
They serve fundamentally different purposes and are often used together. Arduino is a microcontroller it runs one program loop, has no operating system, responds in microseconds to hardware events, and uses milliwatts of power. Raspberry Pi is a full Linux computer it runs an OS, can run Python/Node.js/web servers, supports USB peripherals, camera, and display, but needs seconds to boot and uses much more power. Use Arduino for real-time hardware control (motors, sensors, precise timing). Use Raspberry Pi when you need computation, networking, or a full OS. Many advanced projects use both: Pi handles the heavy logic, Arduino handles the real-time hardware.
With the 12-week roadmap in this guide, most beginners reach a “make anything” confidence level in 8–12 weeks spending 1–2 hours daily. Weeks 1–2 cover the fundamentals needed for 80% of beginner projects. Week 5 onwards adds IoT, WiFi, and display capabilities. Advanced topics (interrupts, EEPROM, TensorFlow Lite) take 3–6 months to use proficiently. The fastest route: buy a starter kit, follow this guide’s project sequence, and build one project per week hands-on building is dramatically faster than reading alone.
The most common reasons: (1) Wrong pin number in code vs. physical wiring double-check every pin assignment. (2) Missing pull-up or pull-down resistor on input pins floating inputs read random HIGH/LOW. (3) Using delay() which blocks all other execution use millis() for non-blocking timing. (4) Sensor needs initialization time add a 2-second delay after Serial.begin(). (5) Insufficient power servos and motors need external power, not Arduino’s 5V pin. Add Serial.println() statements throughout your code to find exactly where behavior deviates from expectation.
These are the two mandatory functions every Arduino sketch must contain. setup() runs exactly once when the board powers on or is reset use it to configure pin modes, start serial communication, initialize libraries, and set initial states. loop() runs continuously in an infinite loop after setup() completes this is where your main program logic lives: reading sensors, checking conditions, updating outputs. Arduino has no main() function like standard C++ the setup()/loop() structure replaces it.
🎯 The Bottom Line
Arduino in 2026 is more capable, more accessible, and more relevant than ever. The Uno R4 WiFi gives you a 48 MHz ARM processor, built-in WiFi, and USB-C at $28. Free simulators like Wokwi mean you can start learning today with zero hardware investment. The 30-million-strong global community means that whatever you want to build, someone has already written the library for it.
The 12-week path in this guide takes you from blinking an LED to deploying a WiFi-connected IoT sensor dashboard. Each project introduces exactly one new concept the most effective way to build both skill and confidence simultaneously.
Start with Project 1 today even in Wokwi. Upload the Blink sketch. Then modify it: change the delay to 250ms, add a second LED on pin 12, add Serial.println(). Those three modifications teach you everything you need to know to progress to Project 2.
⚠️ Important Notes
- Pin current limits: each digital output pin on Uno/Uno R4 supplies maximum 20mA continuously, 40mA peak. Never exceed this it permanently damages the microcontroller.
- The 5V pin on Arduino Uno can supply approximately 400–500mA total. For servos or multiple LEDs, use an external regulated 5V supply with shared GND.
- Board prices cited are approximate 2026 retail prices from arduino.cc. Third-party compatible boards are available at lower prices but vary in quality.
- Code examples tested on Arduino IDE 2.3.x with Arduino AVR Boards 1.8.6 and Arduino UNO R4 Boards 1.2.x. Minor syntax differences may exist in other versions.
- Wokwi and Tinkercad simulate Arduino behavior but may have minor timing differences compared to real hardware always verify critical timing on physical hardware.
Oliver Adams
Daniel has 9 years of hands-on experience building embedded systems and teaching electronics from beginner to advanced level. He has programmed Arduino, ESP32, STM32, and AVR platforms across robotics, IoT, and industrial automation projects including commercial deployments in environmental monitoring and EV auxiliary systems. His teaching approach focuses on building mental models first, then applying them through real projects. Every tutorial in this guide has been bench-tested on physical hardware before publication.
Oliver Adkins
Oliver brings 12 years of firmware development experience across automotive, medical device, and consumer electronics sectors. He reviewed all code examples, circuit diagrams, and technical specifications in this guide for accuracy against official Arduino documentation and manufacturer datasheets.
📚 Continue Learning on Procirel
📎 Sources & References
- 1Arduino LLC Official Arduino Hardware Documentation Board specifications, pinout, and microcontroller datasheets [Official]
- 2Arduino LLC Arduino IDE 2.0 Documentation IDE features, debugger, and library manager guide [Official Docs]
- 3Microchip Technology ATmega328P Datasheet Pin current limits, memory specs, ADC resolution [Datasheet]
- 4Renesas Electronics RA4M1 MCU Datasheet Arduino Uno R4 processor specifications [Datasheet]
- 5Wokwi wokwi.com Free browser-based Arduino and ESP32 simulator [Tool]
- 6Autodesk Tinkercad Tinkercad Circuits Beginner drag-and-drop Arduino circuit simulator [Tool]
- 7Arduino Project Hub projecthub.arduino.cc 5,000+ community projects with verified schematics and code [Community]
- 8TensorFlow TensorFlow Lite for Microcontrollers ML on Arduino Nano 33 BLE Sense documentation [Official Docs]
All code examples tested on Arduino IDE 2.3 with physical Arduino Uno R4 WiFi hardware. Specifications cross-referenced with official arduino.cc and manufacturer datasheets.